Learn how to do some simple queries to extract data from the Hadoop/HDFS based HBase database using its REST API.
Are you getting stuck trying to figure out HBase query via the REST API? Me too. The main HBase docs are pretty limited in terms of examples but I guess it’s all there, just not that easy for new users to understand.
As an aside, during my searches for help I also wanted to apply filters – if you’re interested in HBase filters, you’ll want to check out Marc’s examples here.
What docs do you find most useful? Leave a comment. Should someone write more books or something else?
My Use Cases
There were two things I wanted to do – query HBase via REST to see if a table exists (before running the rest of my script, for example). Then I wanted to grab the latest timestamp from that table. Here we go…
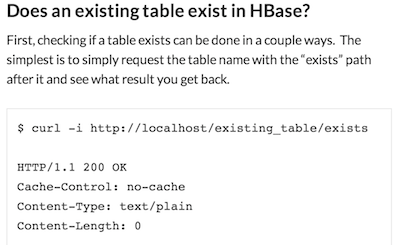
Does a specific table exist in HBase?
First, checking if a table exists can be done in a couple ways. The simplest is to simply request the table name with the “exists” path after it and see what result you get back.
$ curl -i http://localhost/existing_table/exists

HTTP/1.1 200 OK
Cache-Control: no-cache
Content-Type: text/plain
Content-Length: 0

$ curl -i http://localhost/bad_table_name/exists
HTTP/1.1 404 Not Found
Content-Length: 11
Content-Type: text/plain

Not found
Here I use the curl “-i” option to return the detailed info/headers so I can see the HTTP responses (200 vs 404). The plain text results from the command are either blank (if exists) or “Not found” if it does not.
Let’s roll it into a simple Bash script and use a wildcard search to see if the negative status is found:
CMD=$(curl http://localhost/table_name/exists)

if [[ $CMD = *"Not found"* ]]
 then echo "Not found"
else
 echo "Found"
fi
Extract a timestamp from an HBase scanner/query
Now that I know the table exists, I want to get the latest timestamp value from it. I thought I’d need to use some filter attributes like I do in HBase shell:
scan 'existing_table', {LIMIT=>1}
To do this with curl, you want to use HBase scanner techniques to accomplish this (the shortest section in the official docs it seems).
It’s a two stage operation – first you initialise a scanner session, then you request the results. Bash can obviously help pull the results together easily for you, but let’s so go step by step:
curl -vi -H "Content-Type: text/xml" -d '<Scanner batch="1"/>' "http://localhost/existing_table/scanner"

...
Location: http://localhost/existing_table/scanner/12120861925604d3b6cf3
...
Note the XML chunk in the statement that tells it how many records to return in the batch. That’s as simple as it gets here!
Amongst the results of this command you’ll see the Location value returned, this is the URL to use to access the results of the query. Results are truncated and line breaked so you can see the meaningful bits:
$ curl http://localhost/existing_table/scanner/12120861925604d3b6cf3

<?xml version="1.0" encoding="UTF-8" standalone="yes"?>
 <CellSet>
  <Row key="AfrV65UNXD0AAAAs">
   <Cell column="ZXZ...mNl"
    timestamp="1218065508852">
    L2hv...Y3N2
   </Cell>
  </Row>
 </CellSet>
Ugh, XML.. if you want JSON instead just add an ACCEPT property to the header:
$ curl -H "Accept: application/json" http://localhost/existing_table/scanner/12120861925604d3b6cf3

{"Row":[{"key":"AfrV65UNXD0AAAAs","Cell":[{"column":"ZXZ...mnl","timestamp":1218065508852,"$":"L2hv...Y3N2"}]}
...
For now we’ll hack some sed to get the to the value we want, first for the JSON response, second for the XML response. Just pipe the curl command into this sed:
# For application/json
$ curl ... | sed 's/.*\"timestamp\"\:\([0-9]\{13\}\).*/\1/'

# For default XML results
$ curl ... | sed 's/.*timestamp=\"\([0-9]\{13\}\).*/\1/'
Now you can create a basic script the grabs the latest timestamp from the HBase query and decides what to do with it. Here we just assign it to a variable and let you go back to implement as needed.
$ LAST_TIME=$(curl ... | sed 's/.*\"timestamp\"\:\([0-9]\{13\}\).*/\1/')
$ echo $LAST_TIME

1218065508858
Thanks for reading!
If you like this, follow me on Twitter at http://twitter.com/1tylermitchell or with any of the other methods below.